Add a Data Disk to an Azure Linux Virtual Machine

Steps in Brief

  1. Audit the disks currently attached
  2. Create a new data disk
  3. Attach the disk to the virtual machine
  4. Prepare the new disk
  5. Mount the disk
  6. Fix so it automatically mounts

Audit the disks currently attached

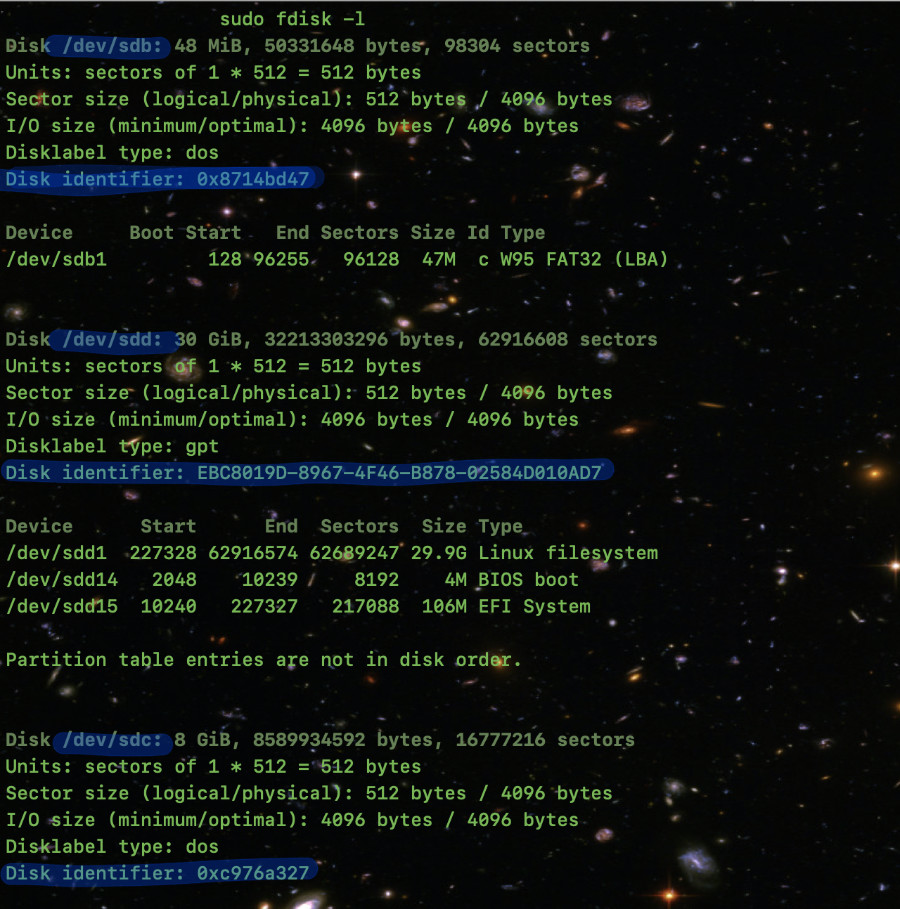
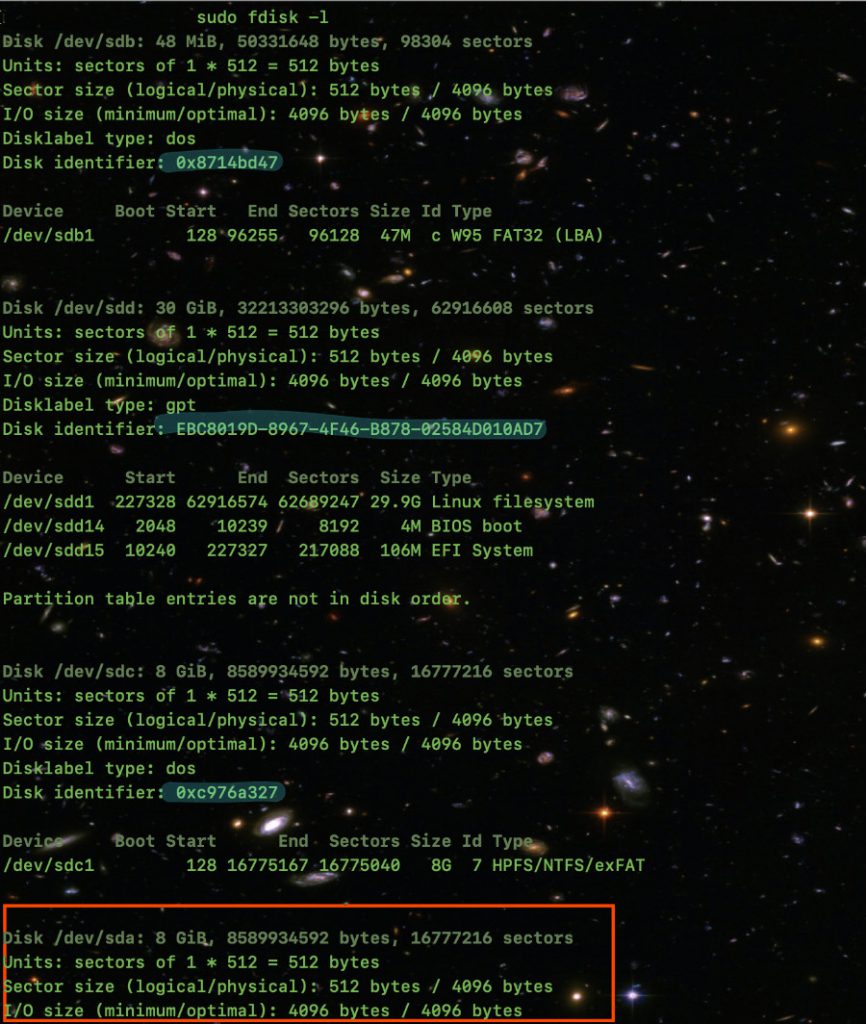
Before adding a new disk, it’s a good idea to see what is there now. This will make finding the new disk much easier. SSH in to the VM and run the command sudo fdisk -l

Current disks

Create a new data disk

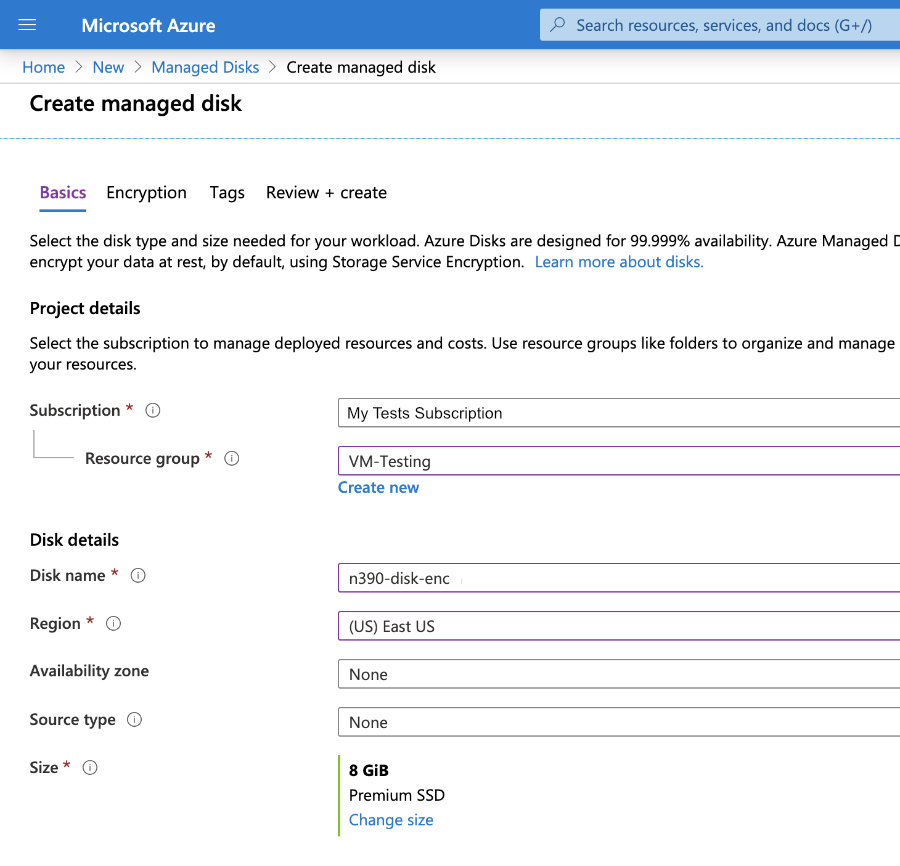
The data disk you create can be independent of the virtual machine. This means it could be created separately and used on any VM. Think of this step like going to the store and buying a new, blank hard disk drive. We’ll attach it to the VM later.

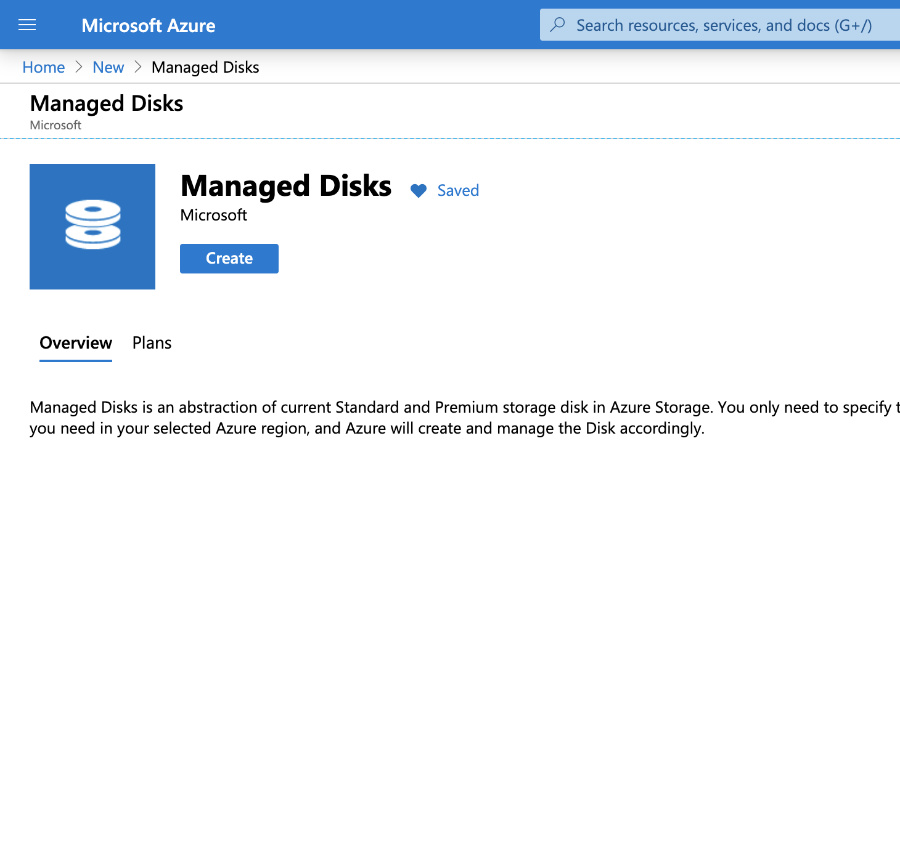
There are several ways to create a disk but in this exercise, let’s use the Azure portal to create a data disk on its own. Click on “Create a resource” in the Azure portal and search for “Managed Disks”.

Create New Managed Disk

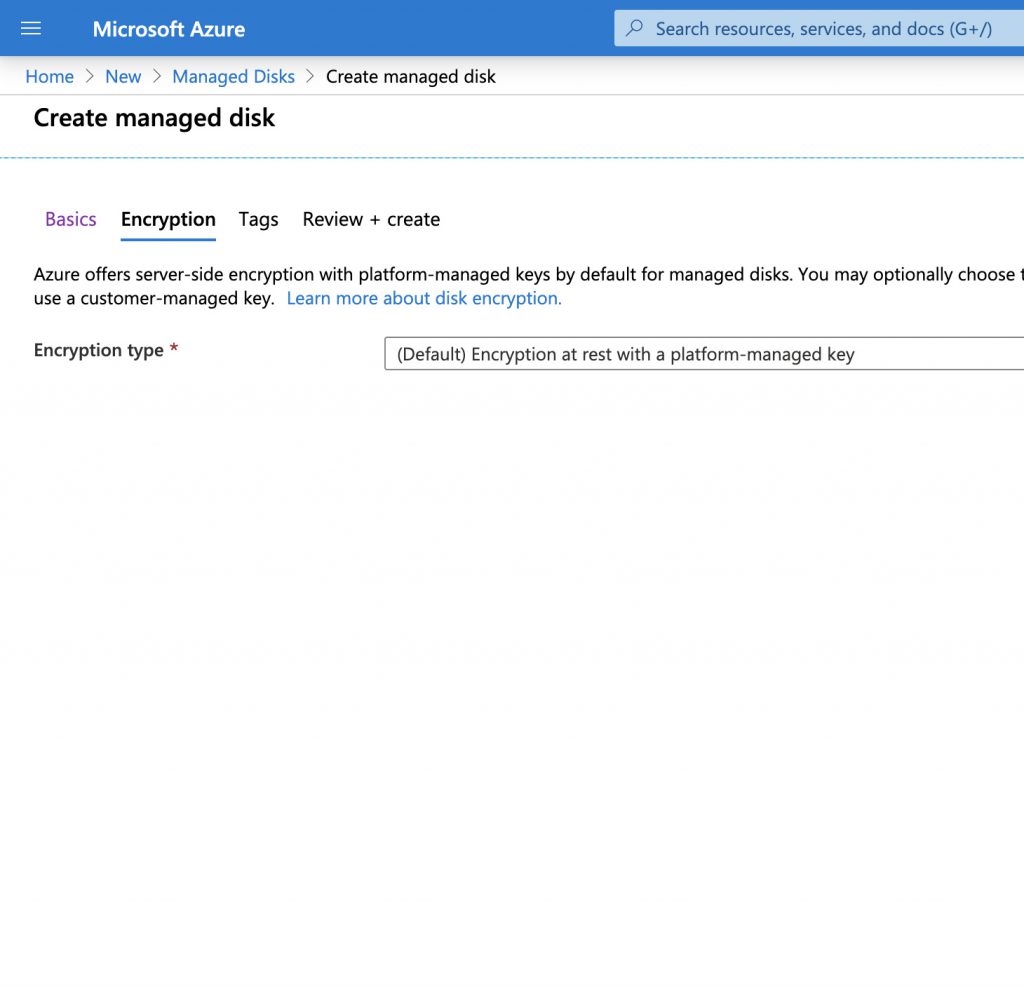
Platform managed encryption is the default and works fine for most cases. Encryption “at rest” means the data that is written to the physical disk in Azure’s data centers is encrypted. It is decrypted to put into memory as a virtual disk for your VM but the actual, physical disk is secured.

Using the default encryption-at-rest option

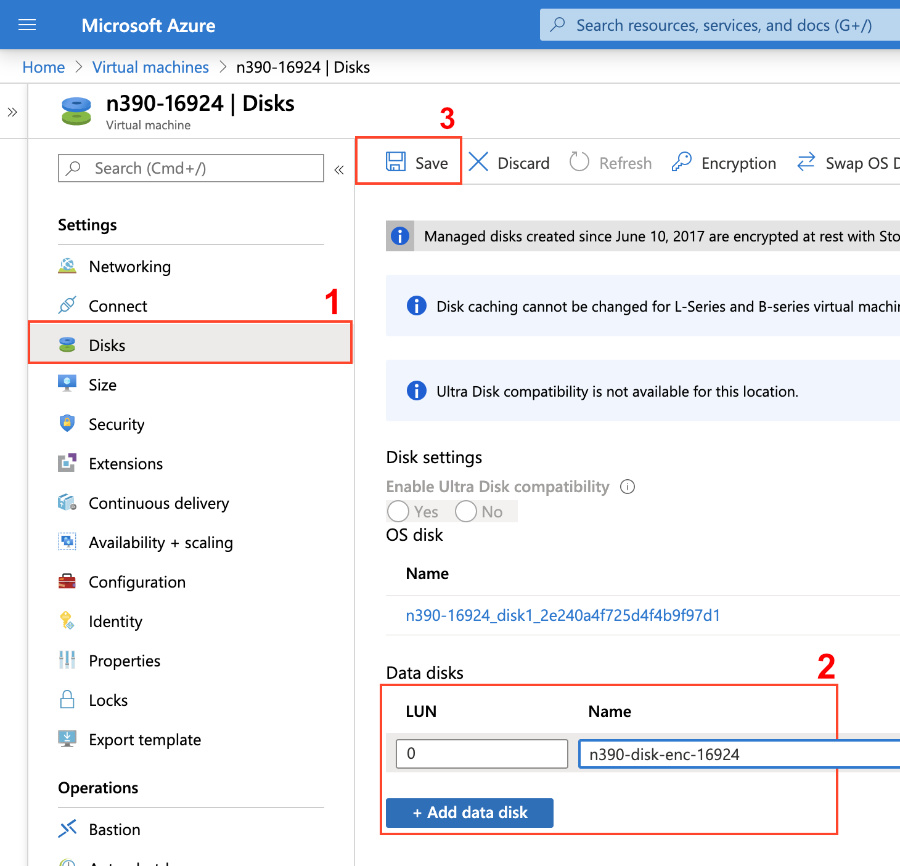
Attach the disk to your VM

Go to the virtual machine you wish to add a data disk for.

You’ll notice in this step you could just as easily create a new disk directly to the VM. However, I created the one separately to highlight the flexibility and independence of data disks. This is an important concept and useful in many situations. For example, you could manage data disks in a different resource group and swap them around as needed.

  1. Click on Disks in the menu
  2. Click on “Add data disk” and select it from the drop-down list
  3. Save
Add data disk to VM

Prepare the disk in Linux

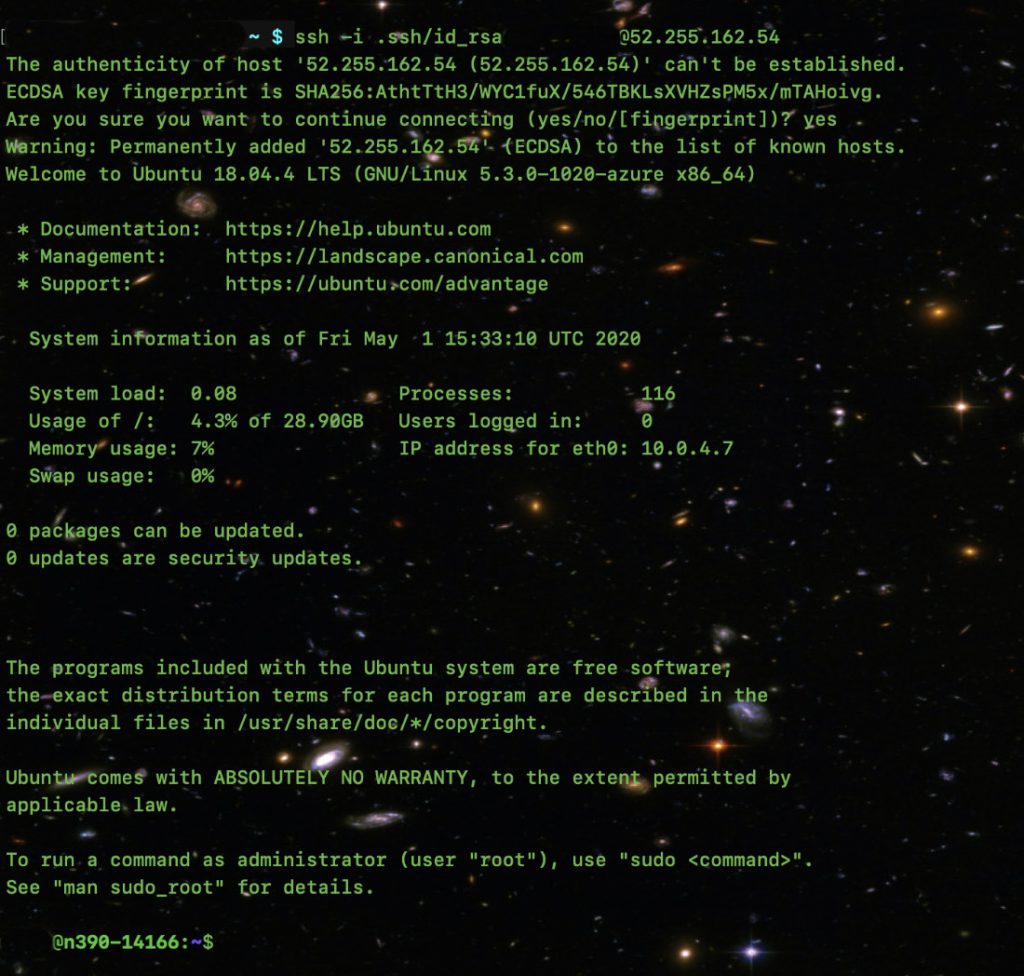
Login the the virtual machine using SSH or the serial console in the VM pane. Preparation of a new disk for use in Linux is basically two parts:

  1. Partition the disk
  2. Write file system to the disk; Format it

First, find the new disk using the command sudo fdisk -l and compare with the set of disks found earlier. In this case the new disk is /dev/sda

The new disk shows itself

Partition the new disk

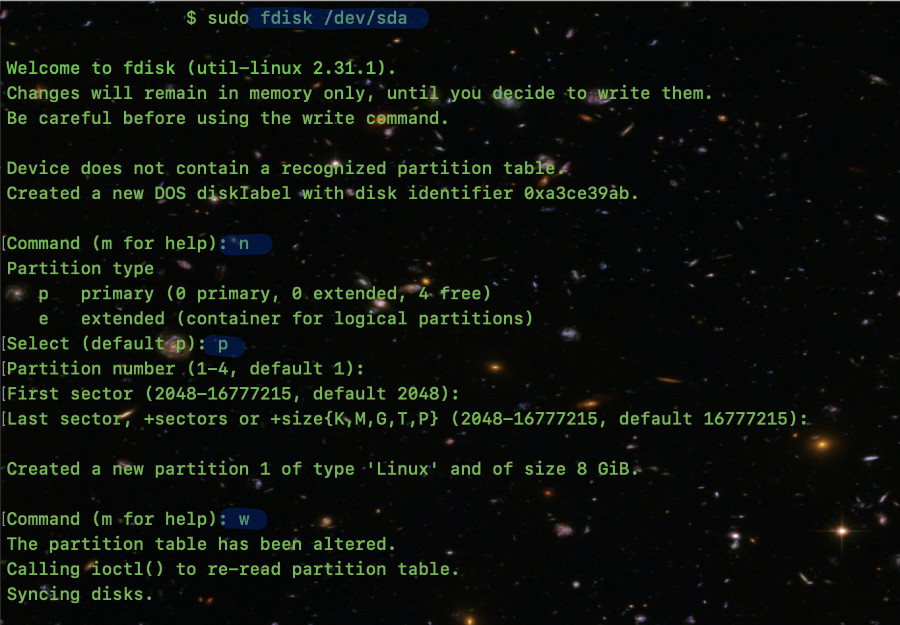
Now that we know with a high degree of confidence which is the new disk let’s partition it using fdisk:

sudo fdisk /dev/sda

  1. Use the n command to add a new partition.
  2. Choose p for a primary partition
  3. Accept the default values for the next three options
  4. Enter w to write the partition and finish
Partition the new disk

Format the new disk

Choose the file system format you want such as EXT4, FAT, MSDOS, etc. To see the different file system utilities on your system do: ls /sbin/mkfs*

In this case, we will format the disk with ext4 which is just fine.

Important! Notice the device path is now /dev/sda1. This is the result of partitioning the disk so make sure not to overwrite anything.

sudo mke2fs /dev/sda1
mke2fs 1.44.1 (24-Mar-2018)
Discarding device blocks: done
Creating filesystem with 2096896 4k blocks and 524288 inodes
...
done

Mount the disk

A word of caution. Microsoft Azure uses the /mnt directory as it’s temporary storage spot. Do not mount your disks there. To be safe, I like to create a new directory like /datadisks and use that.

$ sudo mkdir /datadisk
$ sudo mount /dev/sda1 /datadisk
$ df -h
Filesystem      Size  Used Avail Use% Mounted on
tmpfs           391M  668K  391M   1% /run
/dev/sdd1        29G  1.8G   28G   7% /
...
/dev/sda1       7.9G   18M  7.5G   1% /datadisk

Fix so the disk automounts

To ensure that the drive is automatically mounted after a reboot, add it to the /etc/fstab file.

Get the Universally Unique ID (UUID) of the new disk:

$ sudo -i blkid
...
/dev/sda1: UUID="27bdb6b5-2e86-4bd5-9e20-28eec9436a56"

Add an entry in the end of the /etc/fstab file like so:

$ sudo vim /etc/fstab

...

UUID=27bdb6b5-2e86-4bd5-9e20-28eec9436a56 /datadisk ext4 defaults,nofail 1 2

Finally, reboot the system to see if it all worked. My gosh, I hope you have a backup!

References

Deploy Azure VM using JSON template and PowerShell

Azure Resource Manager templates are JavaScript Object Notation (JSON) files that define the infrastructure and configuration for your resources. In this case a virtual machine.

Steps in brief

  1. Get the virtual machine template files from a known good deployment within Azure portal
  2. Edit the parameters.json file
  3. Run the deployment in PowerShell

Get the template files

There are several ways to get a template file for your deployments. Such as creating it from scratch, GitHub , or the Azure portal. Here, we are using Azure portal to download two files: template.json and parameters.json.

In the Azure portal go to the virtual machine you want to copy. Then click on the “Export Template” menu and then “Download”.

Download JSON template files

Edit the parameters.json file

The template files can be edited to suit your needs, however, the point of this exercise is to reuse an existing deployment. Looking in the parameters.json file, you’ll see most of the parameters & values are self-explanatory and can stay as is. However to avoid name collisions you’ll need to change only a few values.

These three below relate to the Name of the VM and should be unique:

  • networkInterfaceName
  • publicIpAddressName
  • virtualMachineName

You may notice the the value for the Administrator’s password or public key is “Null”. Azure does not export it in the template file so you must add it back in for the new deployment.

  • adminPublicKey
Edit the parameters file

Deploy using Powershell

Now we are ready to deploy a new virtual machine based on the template files.

  • Using variables in the command line is optional although quite useful for scripting later on.
  • If you don’t give the “DeploymentName” it’ll default to something like “template”. I recommend using a name that’ll make sense when you see it in the Azure portal.

Open up Powershell and do the following:

$resourceGroupName = "DemoRG"

$templateFilePath = "/path/to/template.json"

$parametersFilePath = "/path/to/parameters.json"

New-AzResourceGroupDeployment -DeploymentName MyTemplateDeployTests `
 -ResourceGroupName $resourceGroupName `
 -TemplateFile $templateFilePath `
 -TemplateParameterFile $parametersFilePath

After a few minutes you’ll see some details about the deployment like:

DeploymentName          : MyTemplateDeployTests
ResourceGroupName       : DemoRG
ProvisioningState       : Succeeded

.. and so on

Verify the deployment

If you want, here are steps to get the IP address and then SSH into the VM to look around. FYI, this is a Linux VM.

Get the VM public IP address then login using SSH. This will only work if the template is configured with Network Security Group that allows port 22 OR there is a Network Security Group applied to the selected “subnetName” OR similar.

Get the IP address

In the output of this command will be the VM’s public IP address. Note, $resourceGroupName is reused from previous steps. Replace “virtualMachineName” with the VM name you used in the parameters file.

Get-AzPublicIpAddress -ResourceGroupName $resourceGroupName -Name <VM Name>  | select IpAddress

OR This

Get-AzPublicIpAddress -ResourceGroupName $resourceGroupName | Where-Object {$_.name -like "*<VM Name>*" }

OR This

Get-AzPublicIpAddress -ResourceGroupName $resourceGroupName | Where-Object {$_.name -like "*<VM Name>*" } | Select-Object { $_.IpAddress }

Login to the VM

Goto to another terminal window and SSH into the VM. In this case, I am using my private key. Remember the public key was added to the parameters.json file.

ssh -i .ssh/id_rsa admin@192.168.1.1
Success !!

References