A Hands-On Rocket Engineering Experience

What happens when you combine engineering, physics, teamwork, and real rocket launches?
Students don’t just learn about rockets—they build one, launch it, analyze it, and discover the science that makes it fly.
This enrichment program is a project-based introduction to aerospace engineering and scientific thinking. Through a series of engaging hands-on activities, students explore how real engineers design, test, and improve rockets while developing problem-solving skills that extend far beyond the launch field.
What Students Will Do
Throughout the program students will:
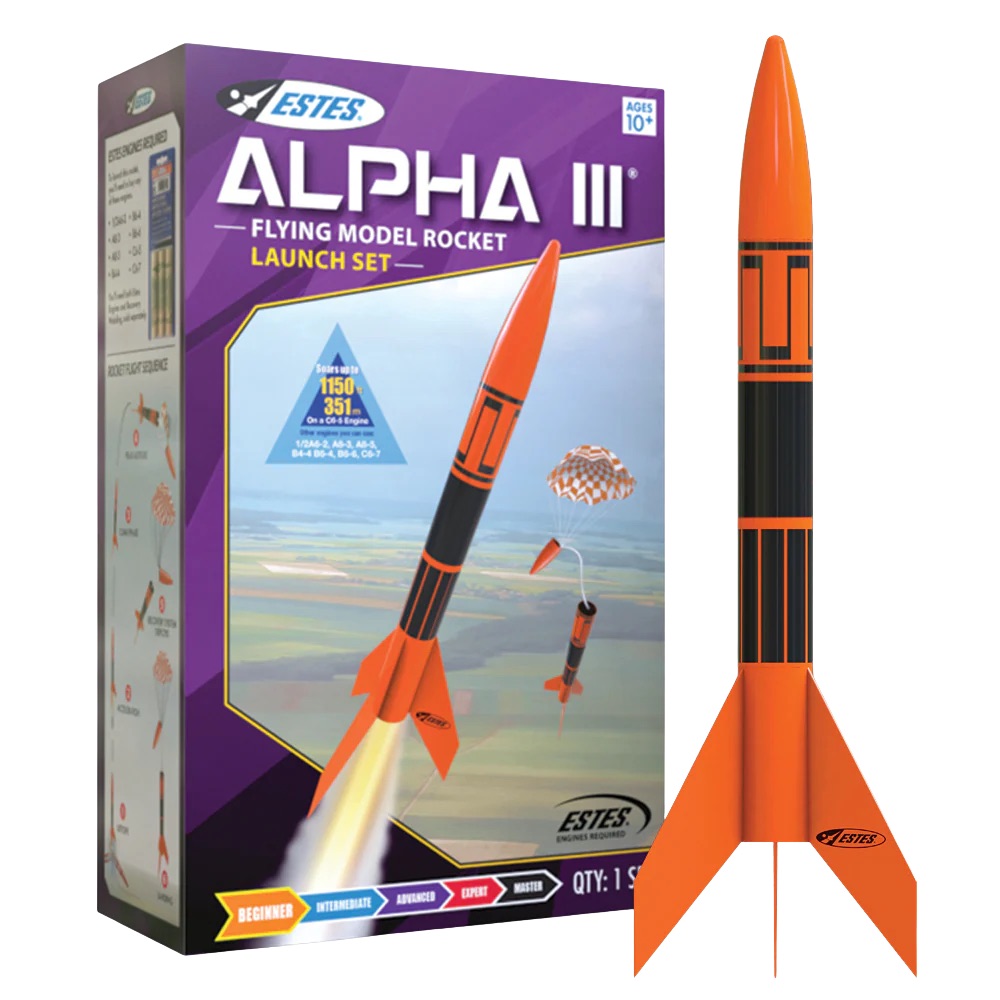
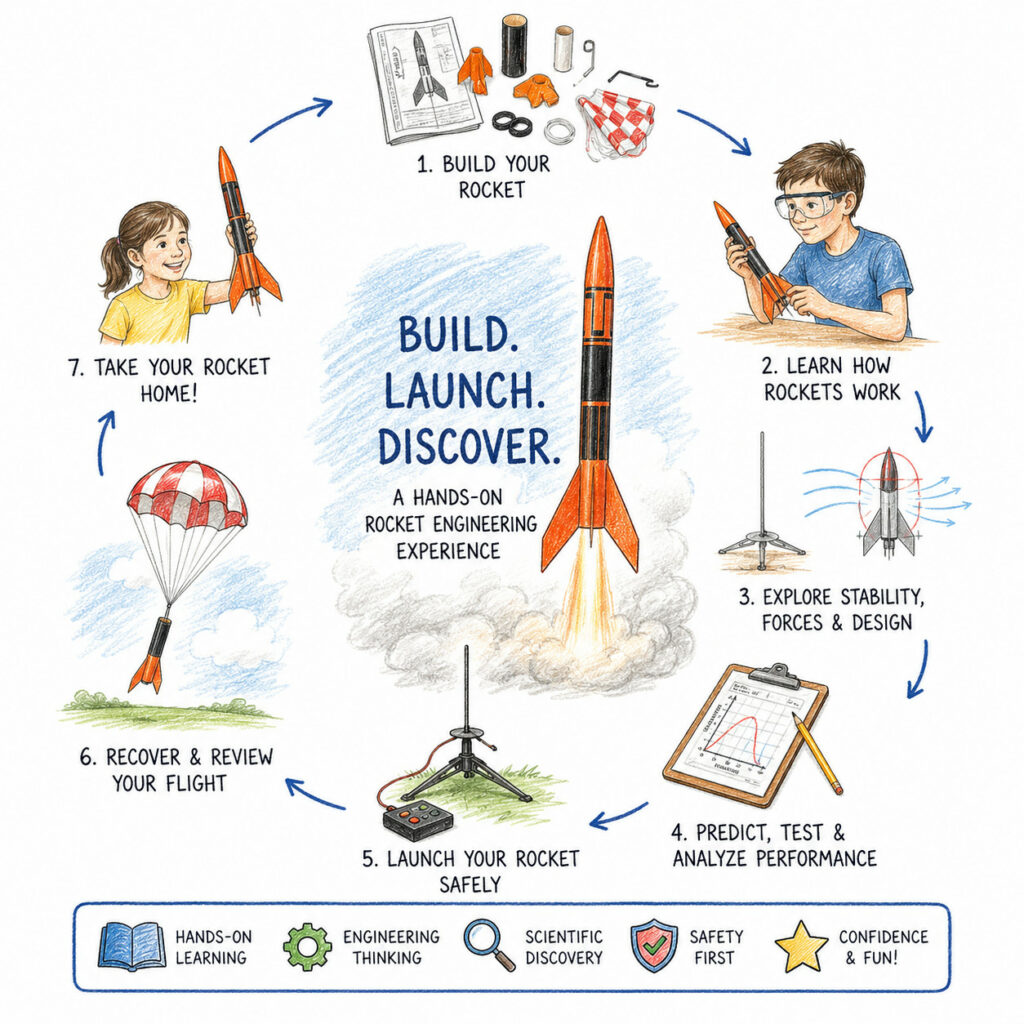
- Build and personalize their own model rocket
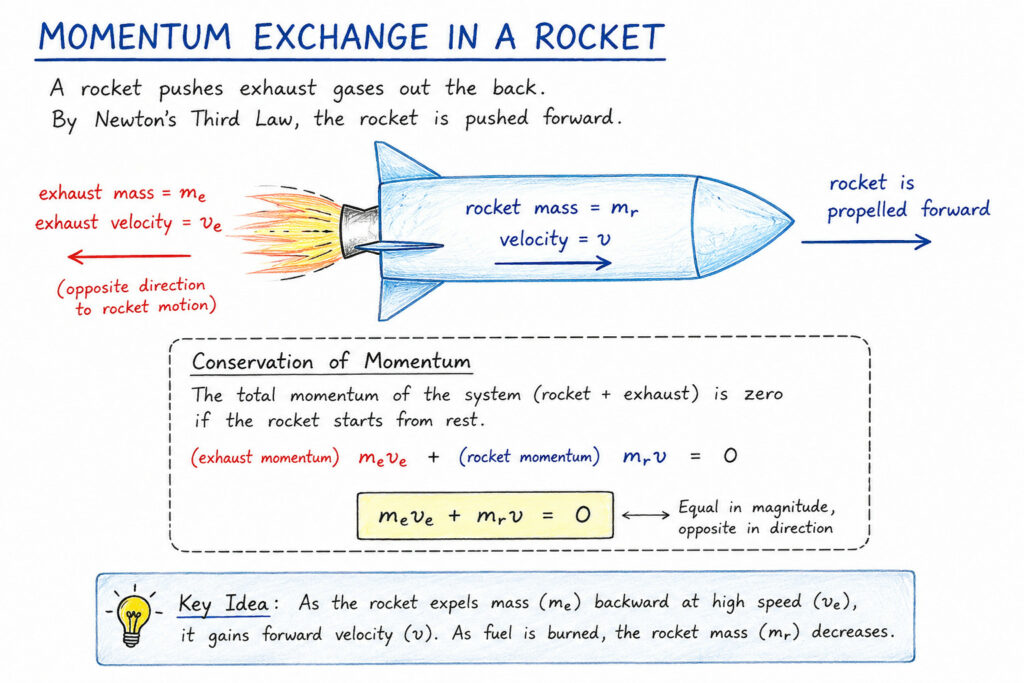
- Learn how rockets generate thrust
- Explore Newton’s Laws of Motion through demonstrations and experiments
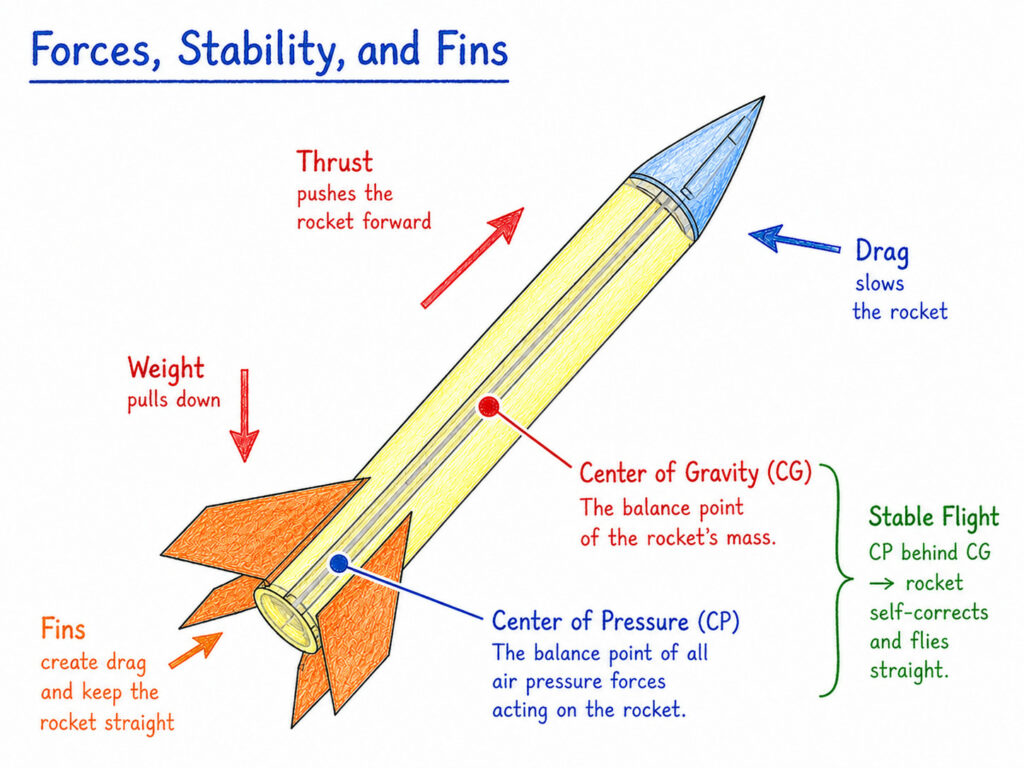
- Discover how fins, mass, and balance affect stability
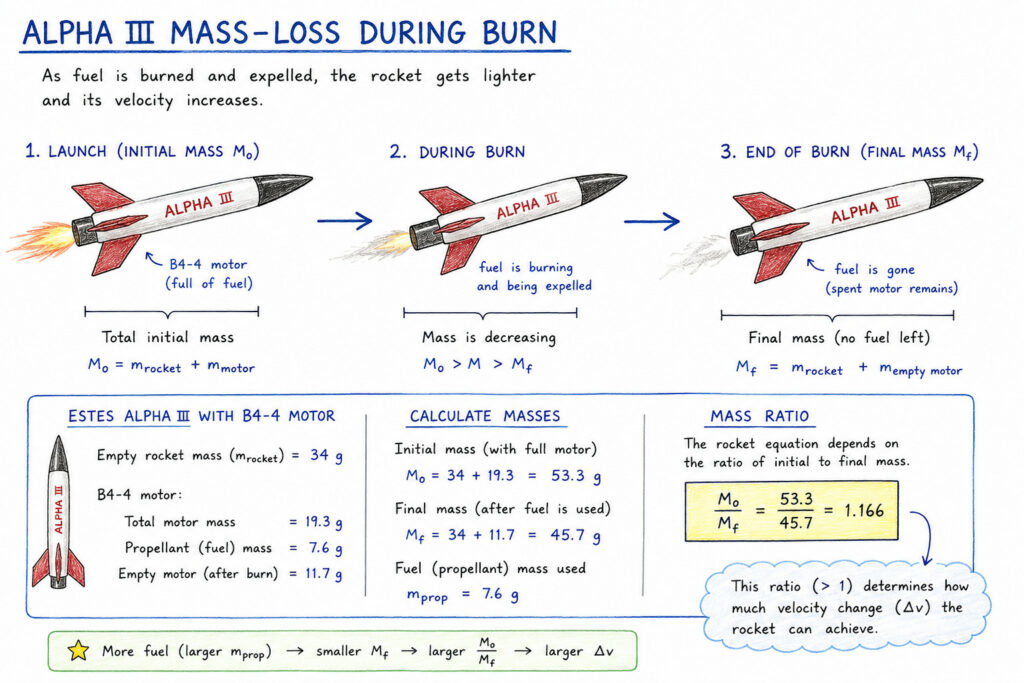
- Measure rocket performance using real flight data
- Practice engineering design through testing and redesign
- Safely launch their own rocket
- Take their completed rocket home
Every lesson combines a short interactive presentation with hands-on activities that keep students actively engaged.
Engineering Through Experience
Students experience the ideas firsthand.
Activities include:
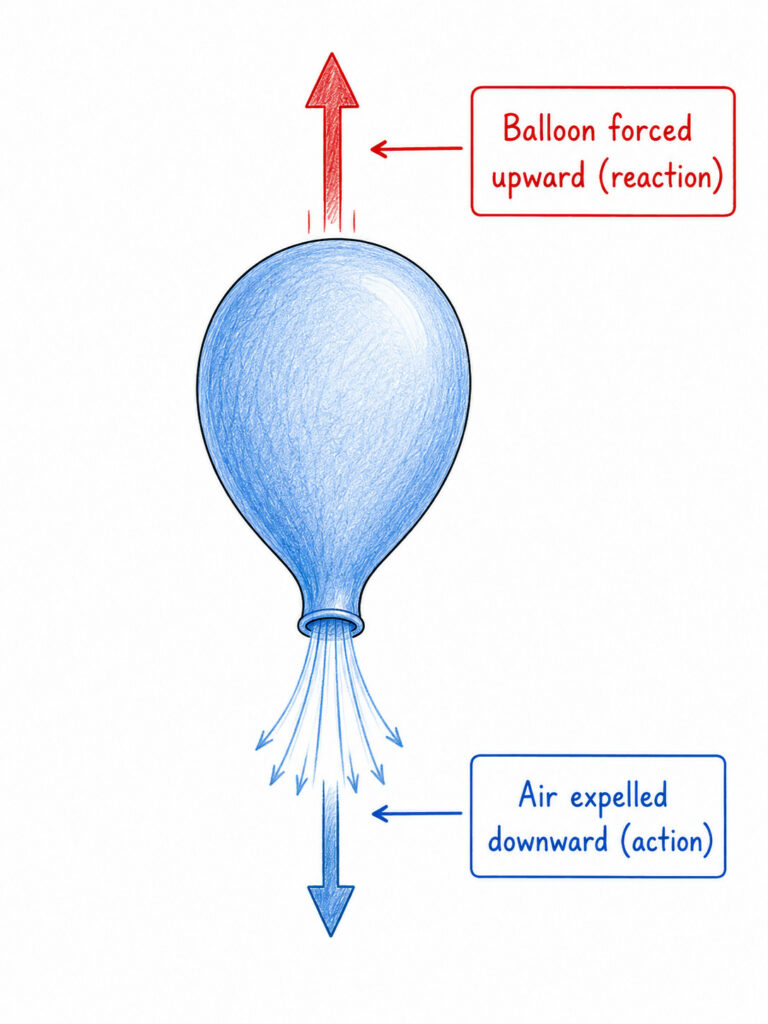
- Balloon rocket experiments
- Paper rocket design challenges
- Rocket stability investigations
- Model rocket construction
- Flight prediction and analysis
- Real launch procedures
- Engineering design challenges
Students are encouraged to ask questions, make predictions, test ideas, and improve their designs just as engineers do.
Safety Comes First
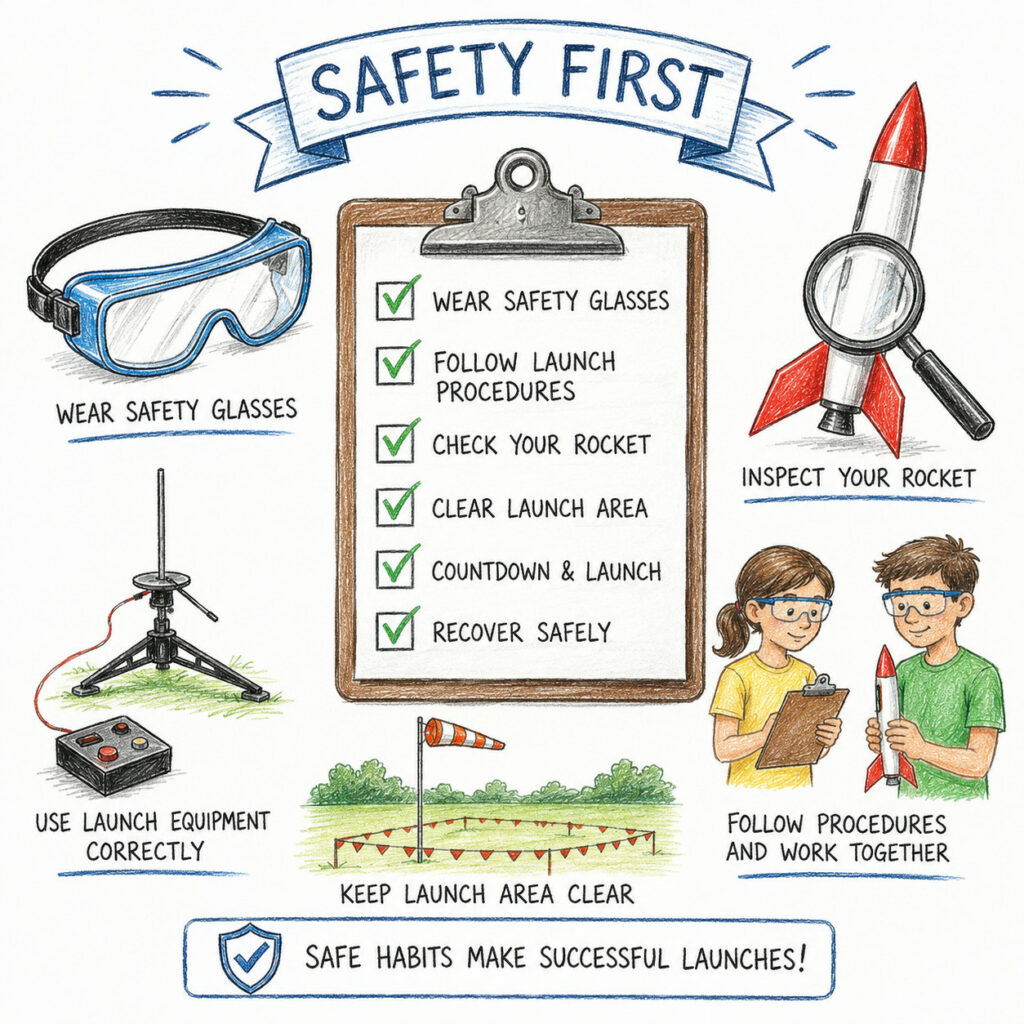
Model rocketry has been enjoyed safely for decades when proper procedures are followed.
Students learn:
- Launch range safety
- Rocket inspection procedures
- Safe motor installation
- Launch pad operation
- Countdown and launch protocols
- Recovery procedures
Safety isn’t simply discussed—it becomes part of the engineering process through structured checklists and instructor supervision.
What Makes This Program Different?
Designed for curious minds. Whether a student dreams of becoming an engineer, loves building things, or simply enjoys discovering how the world works, this program provides an exciting introduction to STEM through one of the most inspiring engineering projects ever created—a flying rocket.
Every student leaves with new knowledge, greater confidence, practical engineering experience, and a rocket they built themselves. The program connects each activity into a complete engineering experience where students learn how scientific ideas explain what they observe.
Topics include:
- Newton’s Laws of Motion
- Thrust and propulsion
- Aerodynamics
- Stability and center of gravity
- Drag and recovery systems
- Measurement and data collection
- Engineering design and iteration
Concepts are presented in an age-appropriate way, emphasizing curiosity and understanding rather than heavy mathematics.
Ready for Launch?
Whether your child is fascinated by space, enjoys building things, or simply loves asking “How does that work?”, this enrichment program provides an exciting opportunity to learn through doing.
What’s Included
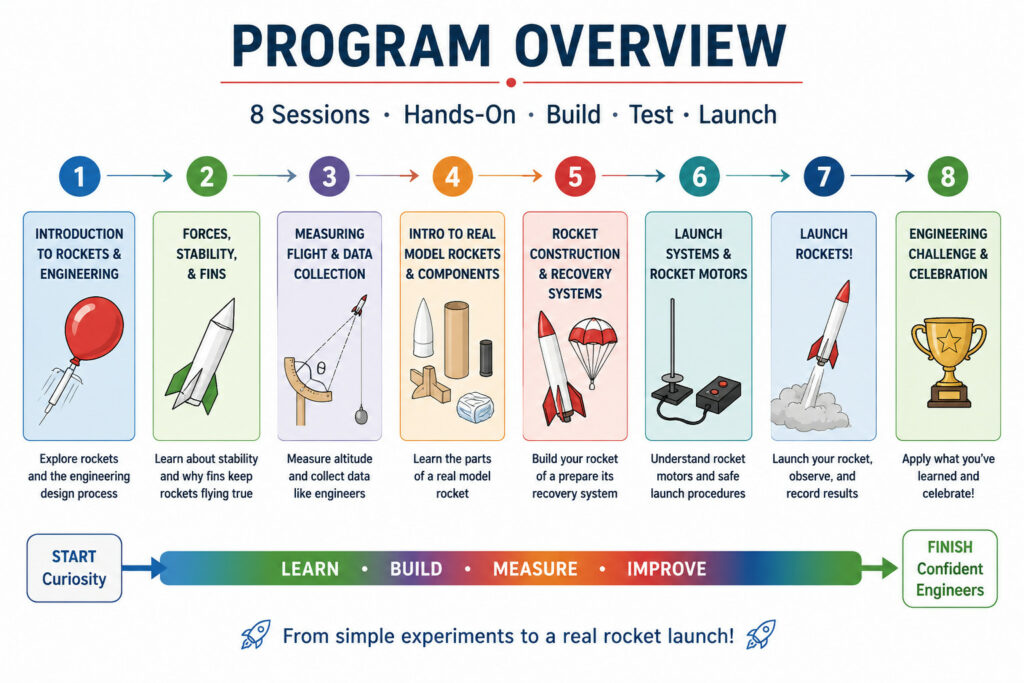
✓ Eight hands-on STEM sessions
✓ Alpha III model rocket kit
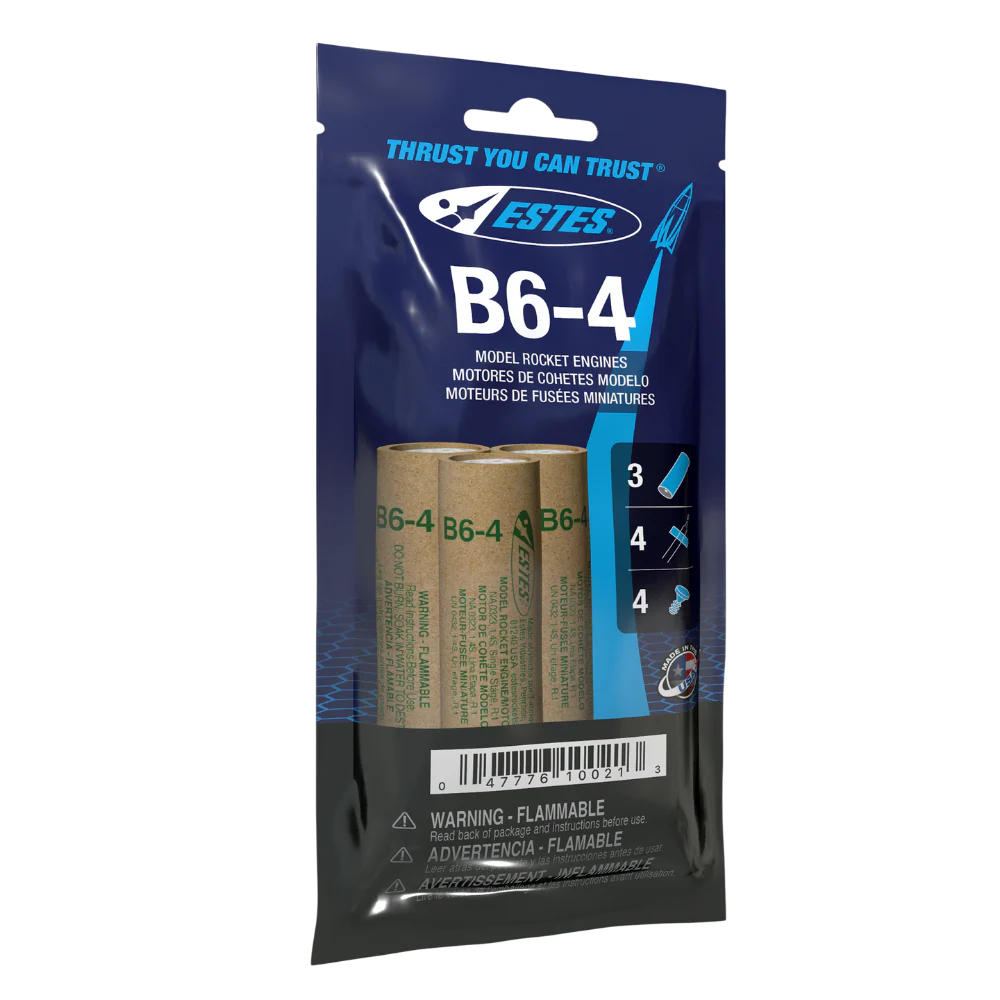
✓ Launch motor(s)
✓ All classroom materials
✓ Safety instruction
✓ Final launch event with experienced rocketeers
Interested in bringing Rocket Engineering to your school, homeschool group, or enrichment program?
Contact me for upcoming sessions, scheduling, and registration details.